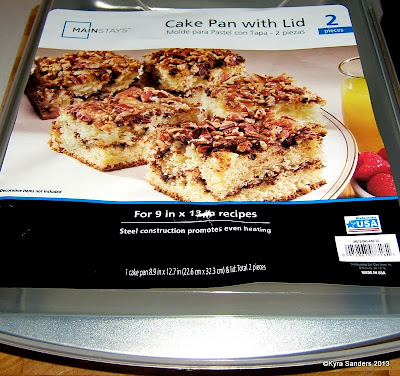
I picked up an inexpensive ($5) covered 9x13 cake pan. The cover will help me store it without the risk of critters, dust, or bunneh hair falling into it.
I bought 2 4-pack boxes of Knox gelatin - $2 per pack. I bought 3 6-ounce bottles of plain glycerin. These are $3 apiece. My total investment was $16. For comparison, an authentic Gelli plate 12 x 14 inches is $70 retail.
The order of ingredients is important. Start by measuring out 2 cups of glycerin in a bowl. I used a plastic bowl, but glass would work too. Sprinkle 8 packets of gelatin over the glycerin and gently fold in so it has a chance to soften. Set aside.
Start some water to boil water. Pour 2 cups of boiling water gently into the glycerin/gelatin mix. Gently stir it until the gelatin is well distributed. How will you know? You won't have any loose water pooling on top of the mix. Next, carefully pour into your pan. You can use any shaped pan, and this amount with this pan yielded a half-inch thick piece of gelli.
Take a moment to remove the little bubbles. I just lightly touched the bubbles, and they either burst, or they attached themselves to my finger. This will be the BOTTOM of your gelatin plate, so I don't think it's critically important. Set it on a level shelf in your refrigerator, or if the weather's cold, set it outside. Make sure it's level and do NOT put the lid on it. You don't want to trap any condensation as it cools.
Gently loosen the gel from the edges of the pan, place a piece of sturdy material (glass, plexiglass, plastic, etc.) over the pan and invert the gelatin. If it doesn't come loose in quick fashion, you need to help it by lifting a corner free, then invert the pan again. Your gel plate is ready to play!
If you did what I did, you could end up with a tear. No worries. Cut it up and place it in a microwave safe bowl, heat until melted, then pour it back in the pan and repeat the process. You can also change it from rectangular to round by doing the same thing and using a different pan/mold. Also, this doesn't have an odor, and doesn't degrade or rot. It's very stable and needs no refrigeration.
Here are some of the first prints I pulled. I used Basics acrylic paint (Michael's artist paint), Golden fluid acrylics and cheap Apple Barrel acrylic paint. They all worked about the same. If you want more time to work, mix a little fluid medium into the paint before you put it on the plate. That extends the drying time.
I used a variety of tools on my plate. I wasn't gentle because I wanted to know what my plate could do. It is really tough, and holds up to poking and smooshing. That said, it's not going to hold up if you stab it with a palette knife, but you can go into it with catalyst-type tools - I used cut cardboard, a floor adhesive texture tool, masks, and a palette knife.
I used Strathmore Bristol vellum and Gina K Designs Pure Luxury papers to pull these prints. I don't see much difference between them, except the GKD paper has a smoother finish. The paint, however, adds texture making the beginning hand of the paper moot.
This is going to be an awesome tool. I'm probably not going to use it every day, which makes the cover that much more important. Also be aware that once you unmold it, it's a bit like pandora's box - you can't fit it back in the pan the same way it was before you unmolded it. I cleaned it with a baby wipe and water. The best way to clean it is to put paper on it then let it sit until the paint is completely dry. The residual paint will stick to your paper and come off all at once this way.
I hope this encourages you to give a cheap plate a try. It's really easy and works great. Most of all, get out there and PLAY! Leave a comment if you have any questions, and I'll do my best to answer.
Ta for now,
~ky


